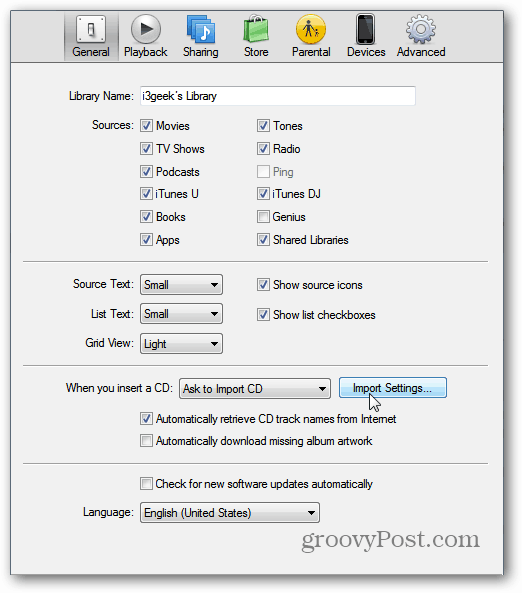
First, open iTunes and go to iTunes » Preferences from the menu bar. If you’re using iTunes for Windows, click Edit » Preferences.
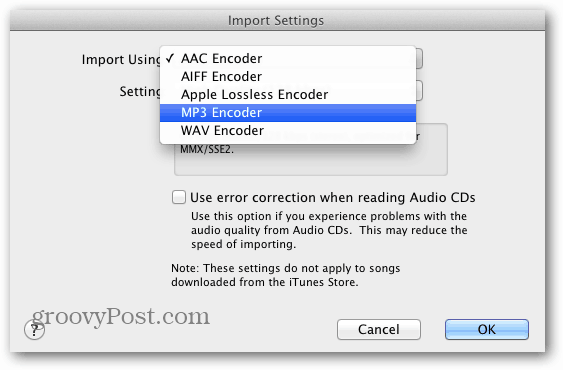
Under the General tab, click Import Settings. Then select the file type you’d like to convert the file to by clicking the drop-down menu next to Import Using.
Next, select the quality you’d like to convert the file to by clicking the drop-down next to Setting.
If you need to use a quality that isn’t listed by default, click on Custom. This is where you can set your own sample rate, Variable Bit Rate and more.
Now, find the track in your iTunes library you want to convert. If it’s not in your library, you’ll have to add it.
With that track selected, click Advanced in the menu bar, then Convert to MP3 or AAC. The file type you selected in the previous steps is displayed.
When the process is complete, two tracks with the same name will show in your library. To make sure you get the right one, right-click the track and select Get Info. Or highlight the track and hit [Command][I] on the Mac or [Ctrl][I] on a Windows keyboard.
Under the Summary tab, you’ll be able to see which file in iTunes is the original and the one you converted. If you want to convert a batch of files, simply select all the files you’d like converted and then follow the same process.
Comment Name * Email *
Δ Save my name and email and send me emails as new comments are made to this post.
![]()


