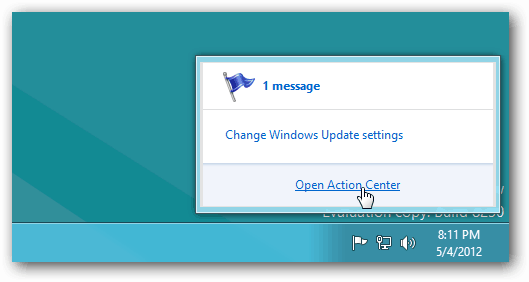
By default, Microsoft has it set to run at 3am. You might wan to change the time or run it manually. Automatic Maintenance is in the Action Center. You can get to it by clicking the Flag icon on the Taskbar in the Notification Area (on the right side next to the clock). Then click Open Action Center.
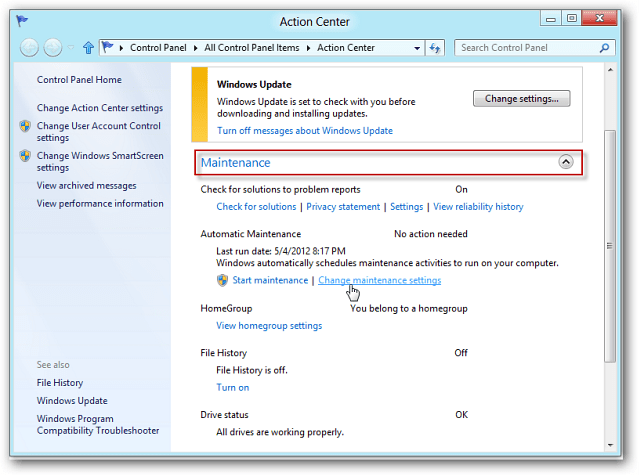
Action Center opens. Expand the Maintenance section and click Change Maintenance Settings under Automatic Maintenance. Click the dropdown menu to change the time Automatic Maintenance runs. If you want it to run daily when you’re not using your computer, check Allow Scheduled Maintenance to Wake Up My Computer if it is Plugged in at the Scheduled Time. If you’re on a tablet or laptop and the device isn’t plugged in, it won’t run. This is handy so Maintenance tasks don’t run and waste battery power. After choosing your settings, click the Save button at the bottom of the screen.
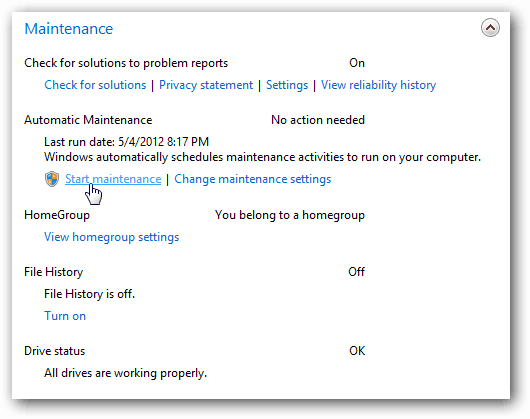
If the Maintenance tasks haven’t run in several days, you can run them manually. In the Action Center click Start Maintenance.
You’ll see a message: Maintenance in Progress. You can stop it at any time.
You’ll also see a clock on the Action Center Flag icon on the Taskbar.
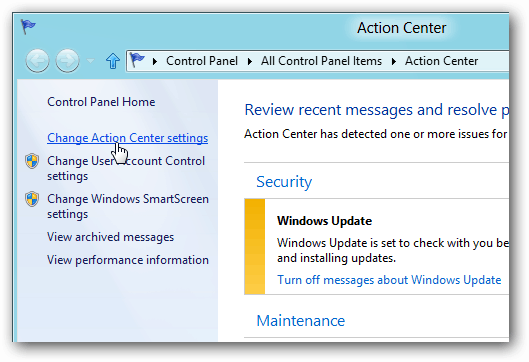
While Maintenance tasks are being run, you’ll see various messages from the Notification Area via Action Center. If you don’t want them to display or just see specific ones, open Action Center. Click Change Action Center Settings.
Then under Automatic Maintenance check or uncheck the messages you want displayed and click OK.
If you’re an average casual user, you should keep these settings as they are. But if you’re an experienced power user and like to control features in Windows 8 you can. Groovy! Comment Name * Email *
Δ Save my name and email and send me emails as new comments are made to this post.


![]()


