Enable Google Assistant on Chromebook
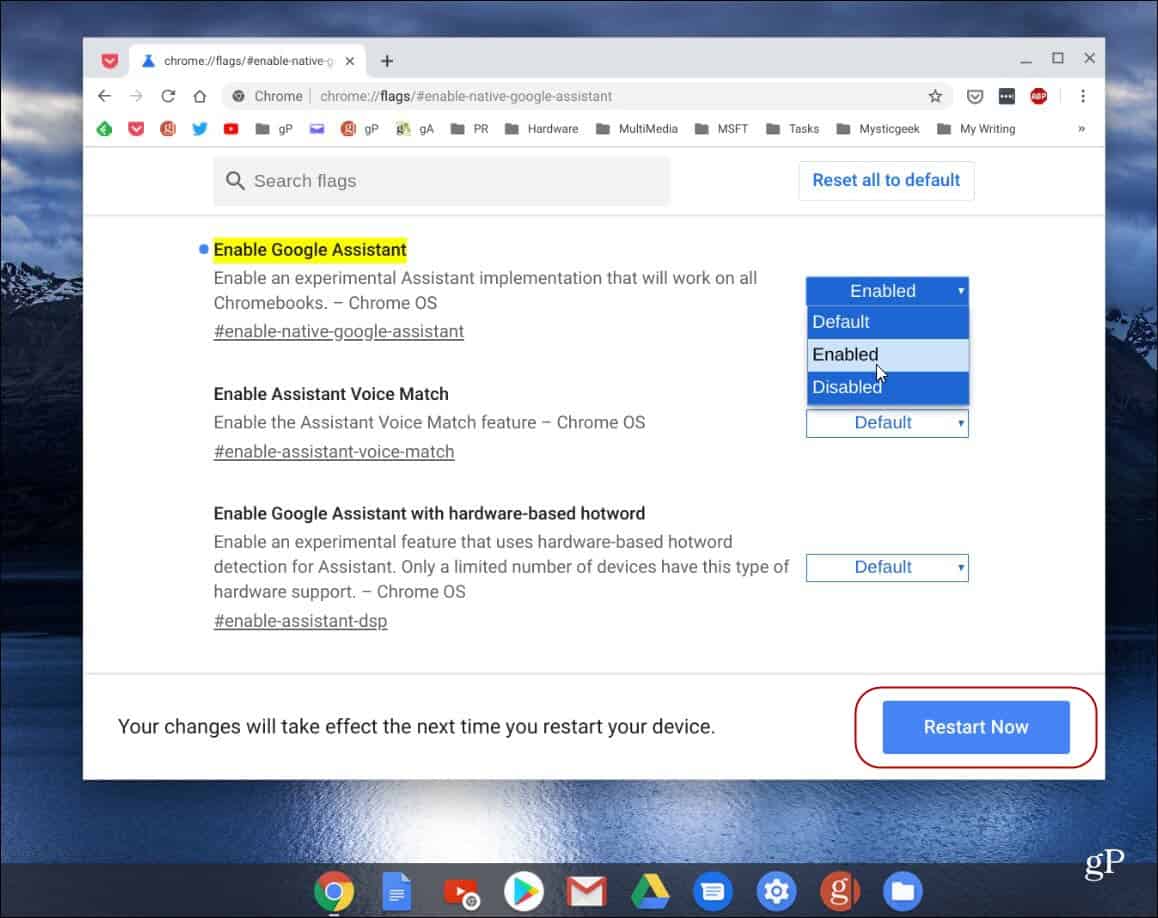
To start things off, you will need to enable a Flag that’s “under-the-hood,” so to speak. Launch the Chrome browser and enter the following path into the search box, and hit Enter. That highlights the “Enable Google Assistant” flag. Click the dropdown menu and choose Enabled. Then scroll to the bottom of the page and click the Restart Now button to restart your system for the changes to take effect.
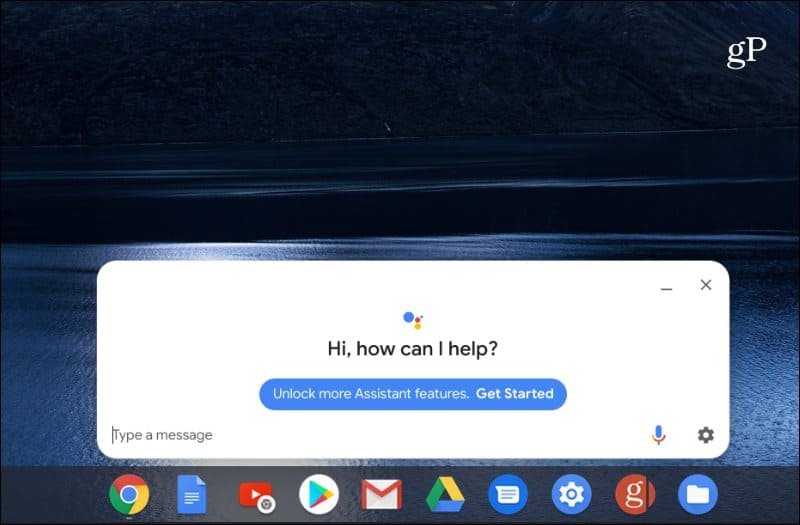
After your Chromebook restarts, you can start using Assistant. Hit the keyboard shortcut Search + A to bring up the Google Assistant screen and type in your queries. Or, if you want it to be voice-activated, enable more features and click the “Get Started” link.
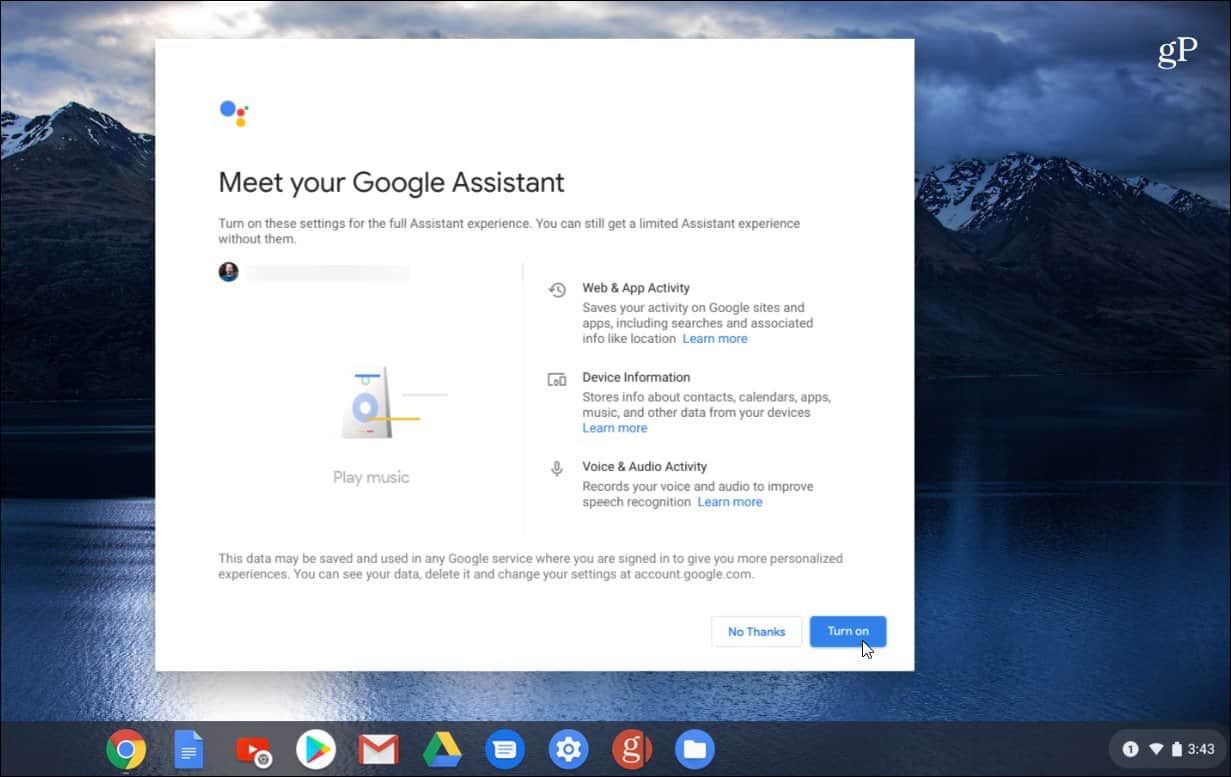
Now you need to follow the onscreen instructions. You’ll need to finish setting up Google Assistant with your account, enable permissions, train your voice, etc.
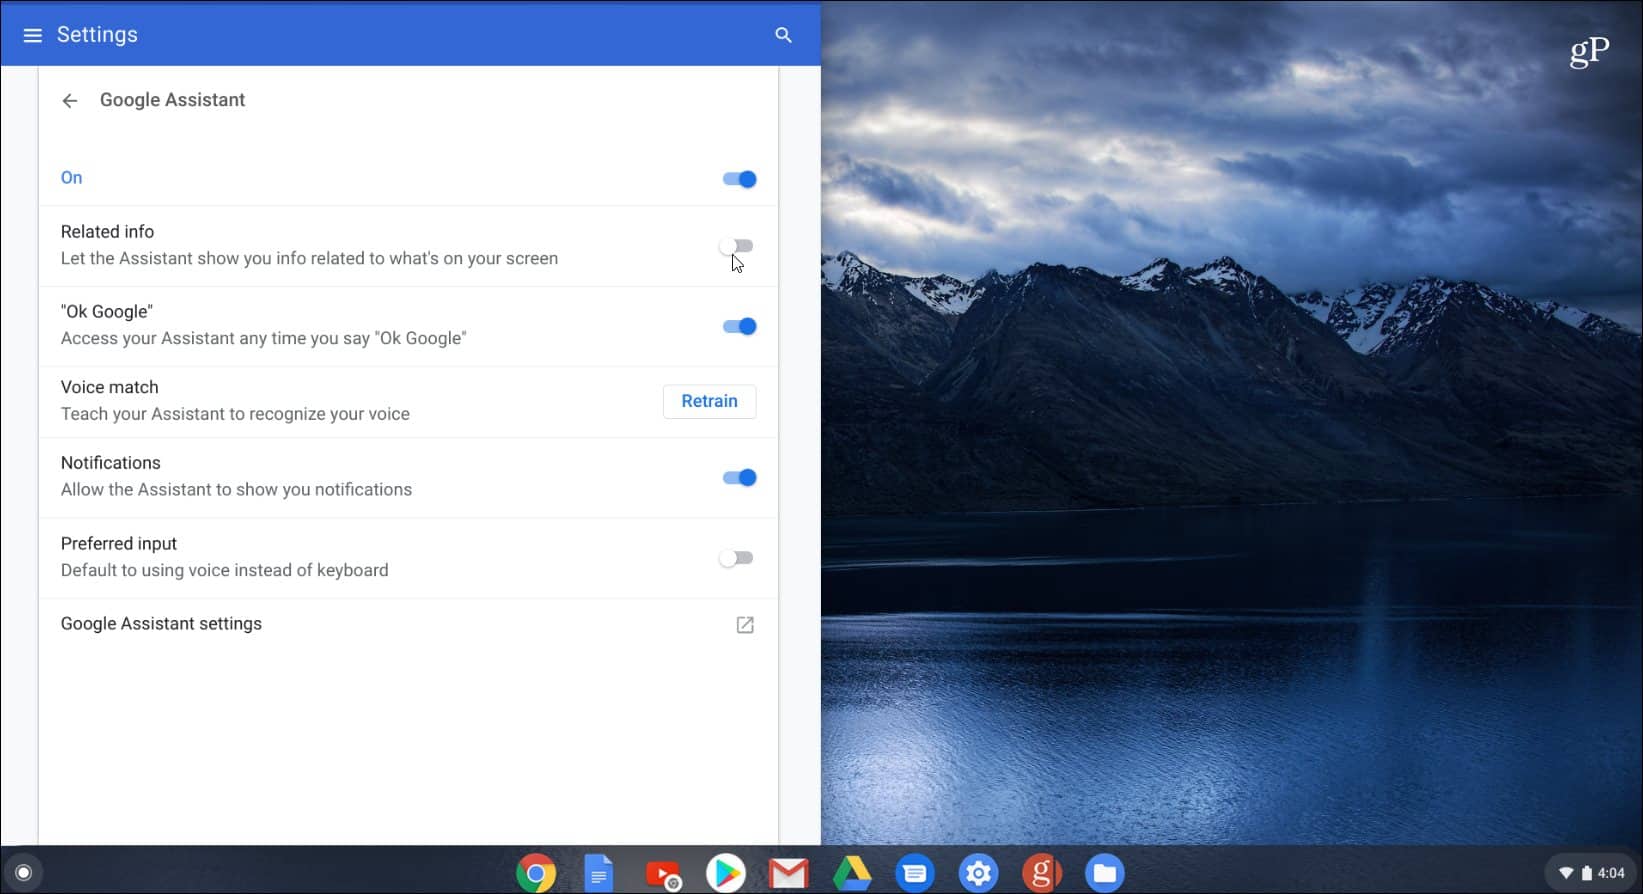
If you want to tweak more Assistant feature, hit Search + A or say “OK Google” or “Hey Google” and then click Settings > Assistant > Chromebook. There you can do things like retraining your voice, allow notifications, voice or keyboard input, and more.
That’s all there is to it! Now you can start using Google Assistant like you would if you do on your Android phone or tablet, Google Home smart speaker, or select TVs. If your new to Google’s digital assistant and aren’t sure what it can do, check out our article on 21 useful things you can say to Google Assistant to get started. Again, Google isn’t set to officially enable Assistant on all Chromebooks until the release of Chrome OS 77. By then, it should be better integrated, more stable, and include more features. Still, it’s cool to turn on Assistant today and give it a try.
![]()


