For instance, if you’re looking to make flyers, you can do this in Word. There are plenty of document templates available, allowing you create the perfect flyer with minimal fuss. If you want to make a flyer in Microsoft Word, here’s what you’ll need to do.
Create a Flyer Using a Template
The easiest way to make a flyer in Microsoft Word is to use one of the ready-made templates that are included in Word itself. You can find these templates from the main launch screen which opens when you launch Word itself. If you’re already working on a file, click the File tab on the ribbon bar to access this menu.
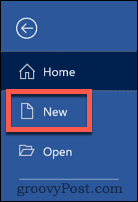
From the File tab, click the New option in the left-hand menu.
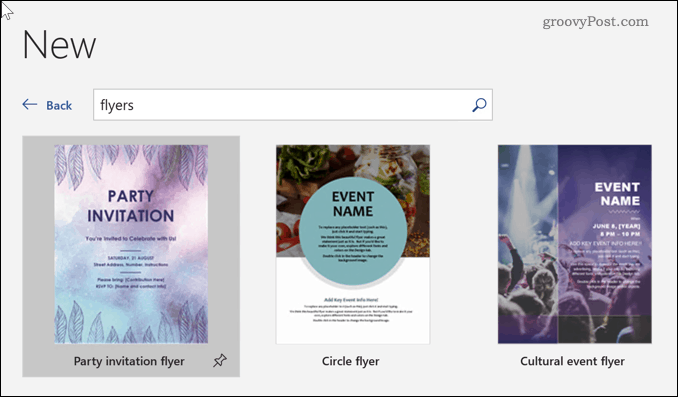
In the Search for online templates box, type Flyers to search for flyer templates, then hit the Enter key on your keyboard.
A selection of different flyer templates will become visible. You can click on any of these to find out more about the template and the options it comes with.
When you’ve found a template you like the look of, click the Create button. This will download the template and open it as a new document. Congratulations! You’ve just created your first flyer in Microsoft Word. From here, you can begin editing the contents of the template to fit your needs.
Edit a Flyer
You’ve got the basic template, now you need the content. To begin editing your flyer, you’ll need to work within the confines of the template itself. To change any of the placeholder text, you first need to click it using your mouse. It should show a semi-transparent highlight when this has been done correctly.
With your text box selected, you can begin typing. Any text you add or edit will appear on your flyer.
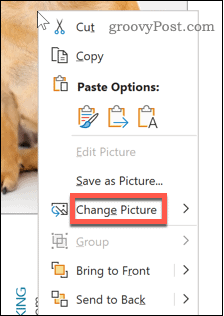
Repeat this for any (or all) of the text you’re looking to change. If there are any sections you want to delete, highlight it and hit the Delete or Backspace keys on your keyboard to remove it. If you want to change a picture on your template, right-click on the image to bring up the context menu.
Hover over to enter the Change Picture menu. From there, you can select one of the available options to replace your image. These include:
From a File allows you to choose any file on your computer to replace the image.From Stock Images allows you to search Word’s collection of stock images to find something suitable.For online images, the From Online Sources option lets you choose from a collection of online pictures powered by Bing.From Icons launches the same window as From Online Sources, but automatically switches to the Icons tab which includes symbols, emojis, and more.From Clipboard to paste a saved image from your clipboard into your Word document.
Once you’ve found the image that you want t0 use, click on it, then hit the Insert option. It will then be added to your flyer. You can use the white dots around the outside of your image to resize your image to fit your flyer template.
Once you’re happy with your template, you can save it or print it to export it elsewhere. If you’re not happy with the results, you can always choose a different template to try out instead.
Advanced Document Creation in Microsoft Word
Word has a lot of powerful features that can help you to create the documents you want quickly and easily. It isn’t just a word processor, after all. You can learn how to remove page breaks in Word to help you rearrange your content. If you want to make your text stand out, you could indent your text for extra emphasis. You could even decide to give up on text altogether and instead learn how to draw in Word to create drawings or to edit existing images. The more you learn about Word’s advanced features, the more impressive your documents should become.
![]()


