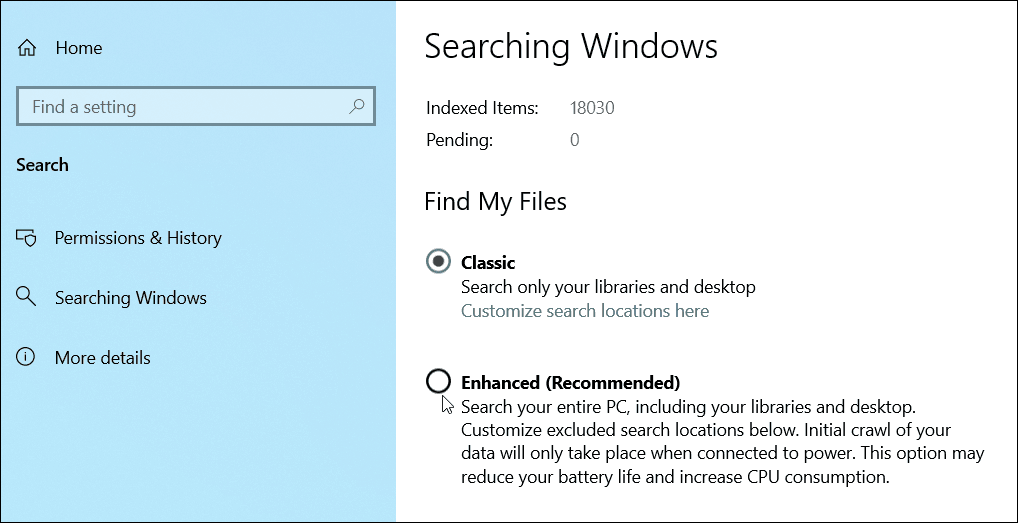
While you can manually tweak search indexing options and search file content — starting with Windows 10 1903, Microsoft is making things easier by including a new “Enhanced mode” for search indexer. Once enabled, Windows will search across all folders and connected drives. Here’s a look at how to enable enhanced search feature. And we’ll also take a look at how you can exclude specific locations from the search process.
Enhanced Search Mode Windows 10
To get started, head to Settings > Search and choose the Searching Windows tab on the right. Under the Find My Files section select the Enhanced option.
Your system will start an indexing process that typically takes 15-20 minutes, but your mileage may vary depending on your system and the amount of data you have. Keep in mind that the indexing takes a lot of system resources so while things are getting indexed, your system performance may be degraded unless of course, you have a fancy NVMe SSD drive with tons of disk IO. You will be able to monitor the items remaining to be indexed while the process is running.
It’s also worth noting that here you can also exclude specific folders from search. This is another way to help make search faster as Windows isn’t combing through a folder you know your files don’t reside. For example, maybe you have a large digital media folder that you don’t need Windows searching through. It’s also a good tip to exclude temporary folders and operating system files as it can slow down system performance. Simply click on Add an excluded folder and browse to the location you want to add.
That’s all there is to it. After the indexing is complete, you should be able to find all of your documents and other files faster. Keep in mind that to use enhanced search mode you need to be running Windows 10 1903 or above.
![]()


