Disable UAC on Windows 11
When you or an app tries to make a change to your Windows 11 system, the UAC screen will pop up. If you know what you’re doing, having to click through this screen every time can be annoying.
Accessing UAC is essentially the same on Windows 11 as previous versions – the UI just looks different. Still, if you’re new to Windows 11, now might be a good time for a refresher. Hit the Windows key on your keyboard and type: uac then click on “Change User Account Control settings” from the menu under “Best match.”
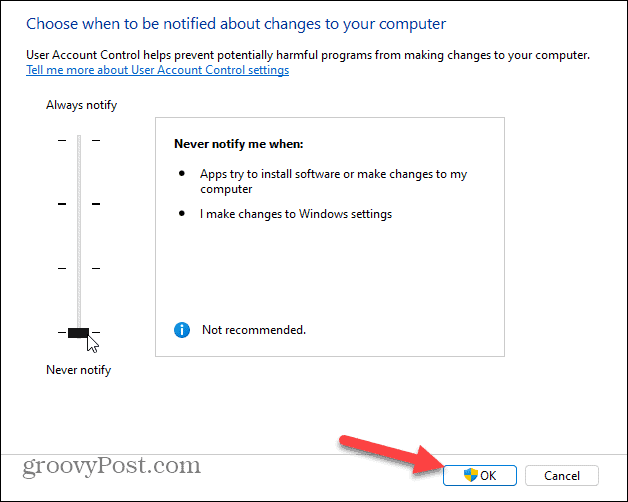
That will launch the UAC Settings screen. This is where you can adjust the slider up or down for more or less user account control protection. Move it to the top to have it always notify when apps and/or you try to install software or make changes to system settings. The default setting is to notify only when apps try to make changes (default setting).
And you can completely turn off UAC by moving the slider to the bottom. You’ll never be notified when apps try to make changes to your system or when you make changes to Windows Settings.
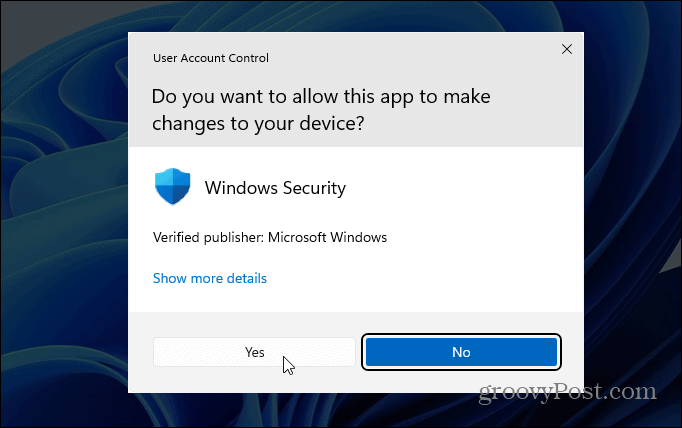
After you are done making your decision, remember to click the OK button for the change to go into effect. Finally, UAC will pop up one more time, verifying you want to make the change. Click Yes.
The choice is yours. You might want to temporarily disable UAC while installing trusted software and turn it back on after that. Or, you might be a power user and have no need for it at all. The good thing is you can adjust it to your liking. And for more on the new OS from Microsoft, take a look at setting Active Hours on Windows 11 to avoid Windows Update restarts. Or check out how to manage Storage Sense on Windows 11. Comment Name * Email *
Δ Save my name and email and send me emails as new comments are made to this post.
![]()


