Although the default install of Outlook creates a .PST file, I like to create multiple PST files to organize my email and my email archives of previous years. Here’re the simple steps for creating and customizing a PST file.
How to Create PST Files in Outlook 2013
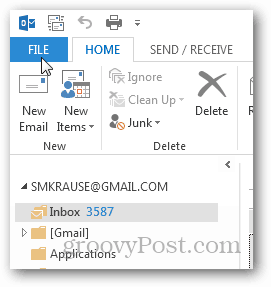
Open Outlook 2013 and click File in the Top Ribbon.
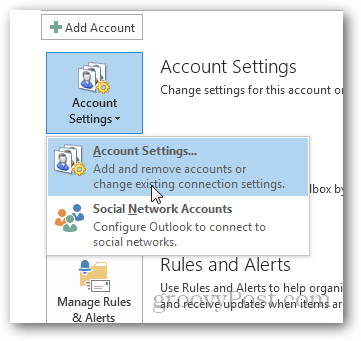
Under Info Tab, Click Account Settings. And Click Account Settings again.
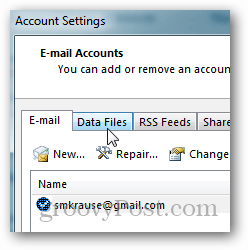
Click Data Files.
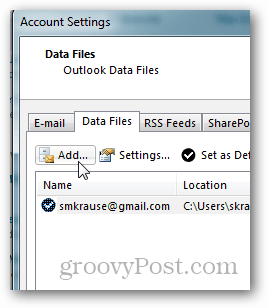
Click Add.
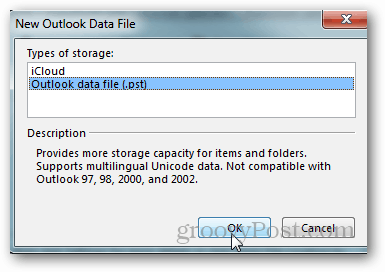
Click Outlook data file (.pst) and Click OK.
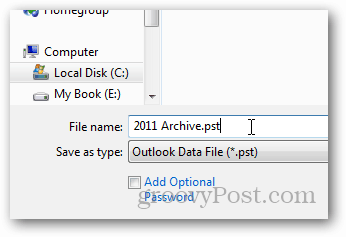
Name the File and Click OK to save it. Note: Optionally, you can check the box below the name to add a password or you can do this later. Just be aware, this will not encrypt your PST file, and it’s a simple process to break the password and gain access to the PST. Personally, I never use a password on PST files.
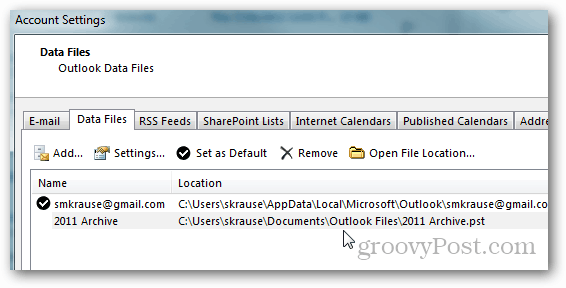
After Clicking OK, your Data Files / PST files will be listed along with their path. Notice my 2011 Archive PST I just created is listed here.
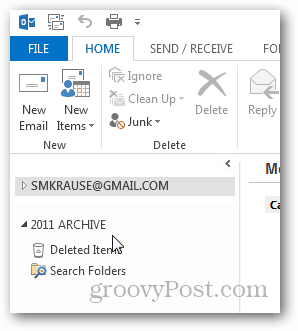
Click Close to continue on the Account Settings page. Outlook will take you back to your Inbox HOME tab and if you minimize your Default Mailbox, your new PST Files, and Folder Structure will be waiting there for you.
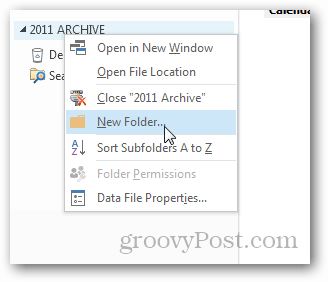
At this point, I like to create a folder called Inbox so I can move old email from my current PST file / Mailbox into this Archive Folder. To do this, Right-click the new PST File Archive and Click New Folder.
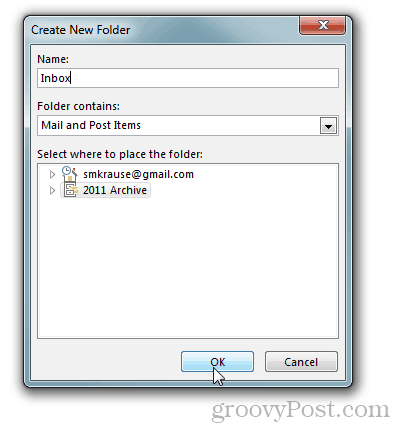
Give it a name Inbox and Click OK.
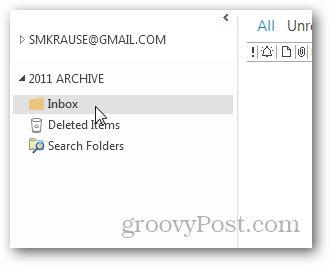
And there it is.
From here you can Drag-and-Drop email from your current Inbox into your new Archive Inbox. Just remember to have a solid backup solution when you start creating Archives on your computer in case your drive dies and you need to recover old PST files. I’ve experienced that people don’t initially understand that you can close the data file. They think the navigation pane will be cluttered up with numerous folders from each years archived mail. With this in mind I think it’s worth pointing out that you can right click the data file in the navigation pane and click “close” Then when/if they need to access their old mail, click File > Account Settings > Account Settings > Data File tab > Add Navigate to and select the Data file Click “OK” Simon H Did you work out how to change folder bottom in Outlook 2013 like 2010? Regards Viness Regards Sarah No it’s not. That’s a stand-alone tool not included in Outlook. If you have a corrupt PST file you will still need to use SCANPST to correc.t Just to comment Microsoft should not default the type of file created ie OST or PST, they should ask. But if they are not going to ask they should default the file type to PST if the email account being setup is an old style account. I would call that common sense but I tend to find that common sense occurs very infrequently and so is not common at all. Andrew Any ideas? My Old PC Win 7 with Office 2010, it have 82 pst files total 5.1GB in a single user profile, When transfer to office 2013 it only can add until 74 .pst files, continue add will can out Error messages ” outlook has exhausted all shared resources, please close all messaging application and restart outlook (example Skype for Business). ” I do it to an other Win 7 with office 2013, it same. But try on Win 7 with office 2010 is ok can add all 82 .pst files. Already try run Scanpst. Pls advice. On Home bar select Rules; Create Rule; Click Advanced Options; check “with a size in a specific range” In Step 2, click the blue underscored link; leave top on “0” and “999999” in bottom box; click OK Click next Check “move it to the specified folder” In Step 2 click blue link again, find your PST inbox and select it; click OK Then click Finish Comment Name * Email *
Δ Save my name and email and send me emails as new comments are made to this post.
![]()

