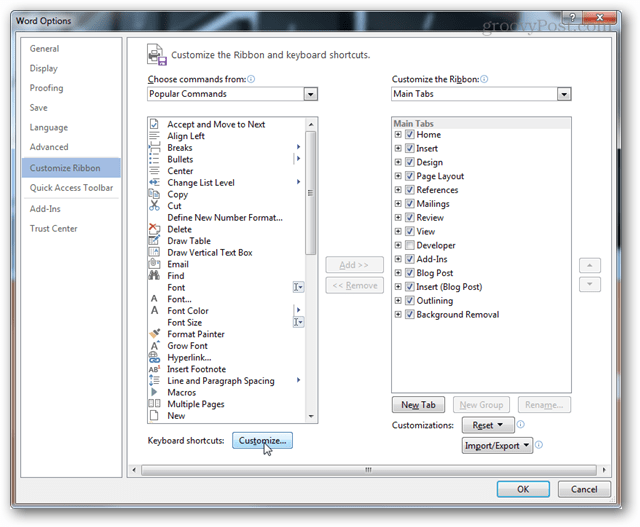
Launch Word 2013, then click the File Menu.
From the Backstage view click the Options button.
In Word Options, click the Customize Ribbon button. Then click the Customize button at the bottom adjacent to the “Keyboard shortcuts” label.
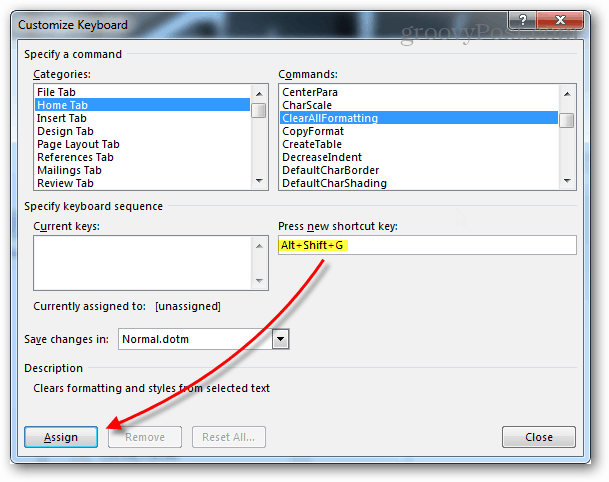
Select a category, and then browse through the commands. You’ll see that the majority of the commands in Word 2013 don’t have any keyboard shortcuts assigned. This is mostly because there are nearly one thousand commands in total and it would be crazy to remember hotkeys for all of them. If a command does have a hotkey, it will be listed under Current Keys.
To add a new shortcut key, select the command you’d like to add it to. Next, click the empty white box under the “Press new shortcut key” label. While the text cursor is blinking in this box, press the keyboard combination you’d like to set as the shortcut key. Pressing multiple different combinations will allow you to add numerous hotkeys at once to a command. Each command is separated by commas. You can use the Backspace button on your keyboard to remove them if you type too many. Once entered, click the Assign button to bind (save) the shortcut key to the command.
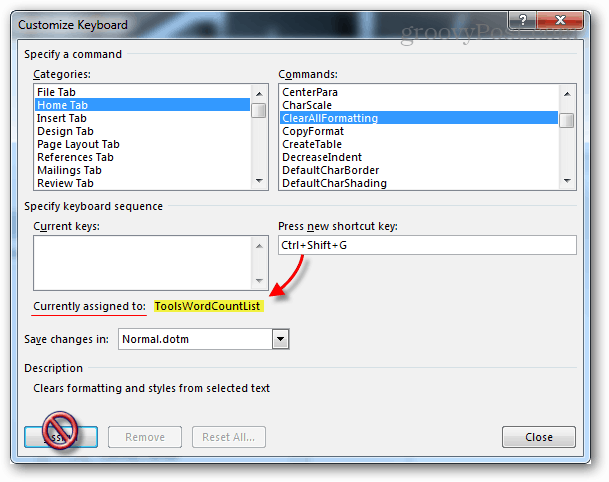
If you enter a keyboard shortcut that’s already used by a different command, you’ll see the name of the attached command listed after the “Currently assigned to” label. Note that you can’t double dip with shortcut keys, assigning a key command that’s already being used will unbind it from the original command.
If you feel like you’ve messed something up, in the worst case scenario there’s a reset button that will restore all hotkeys to defaults. It’ll be the same as when you first installed Office 2013.
New shortcut keys will appear as tooltips just like the original commands do. So if you ever forget which hotkey goes where just hover over the tool in question on the ribbon.
same with my f4 button to 1/4 symbol Comment Name * Email *
Δ Save my name and email and send me emails as new comments are made to this post.
![]()


