We’ve shown you how to limit the amount of disk space the Recycle Bin uses. But Microsoft added a utility to Windows 10 that’s still available in Windows 11, called Storage Sense, which makes keeping a handle on your storage space a lot easier. And it includes management of the Recycle Bin. Here’s how to automatically make Windows 11 clear out the Recycle Bin on a schedule, so you don’t need to think about it.
How to Automatically Delete Recycle Bin on Windows 10
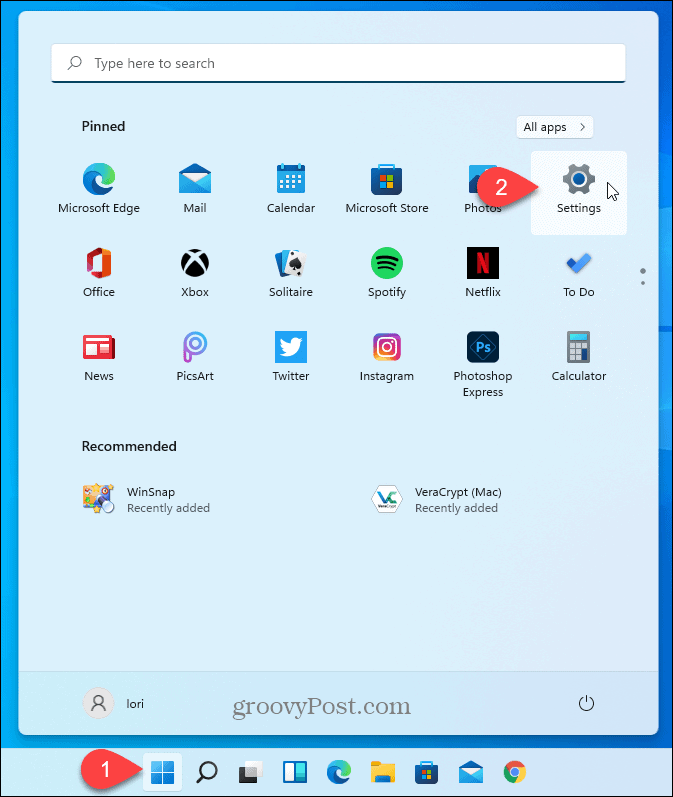
Go to Start menu > Settings.
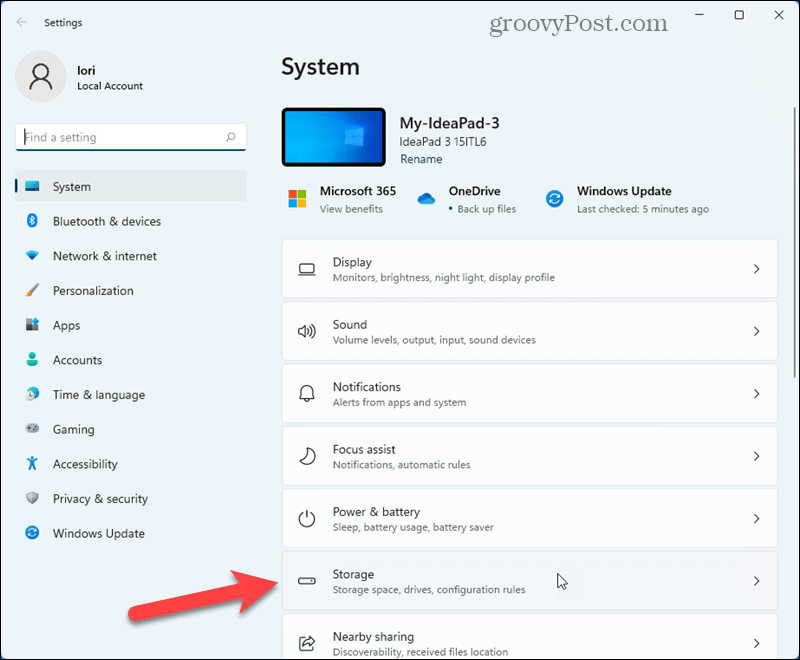
On the System screen, click Storage.
Click Storage Sense on the Storage screen.
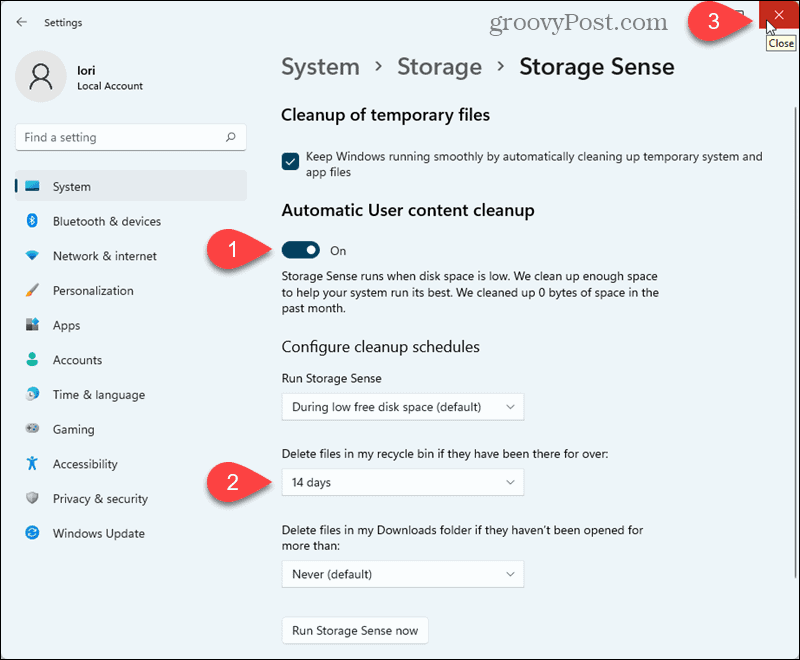
On the Storage Sense screen, click the slider button under Automatic User content cleanup to turn on Storage Sense. Under Delete files in my recycle bin if they have been there for over, select a number of days (1, 14, 20, or 60) from the drop-down list. Windows will permanently delete files in the Recycle Bin that are older than the number of days you select. If you often recover files from the Recycle Bin, you can set the Delete files in my recycle bin if they have been there for over option to 60 days. You can also set it to Never if you want to take advantage of the other Storage Sense features but not automatically empty the Recycle Bin.
This is a helpful feature that helps keep your disk space in check without thinking about it. However, remember that once a file is emptied from the Recycle Bin, it’s gone. Don’t panic, though. You can use a third-party recovery utility like Recuva to recover permanently deleted files. You can also automatically empty the Recycle Bin in Windows 10. Comment Name * Email *
Δ Save my name and email and send me emails as new comments are made to this post.
![]()


