Enable Two-Step Verification for your Apple ID
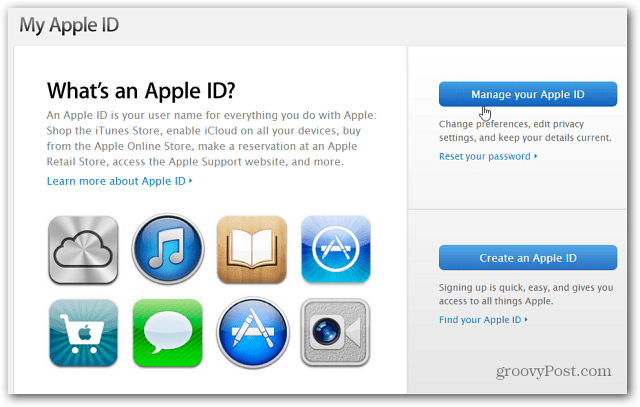
To add the extra layer of security to your Apple account, go to the My Apple ID page, and click Manage Your Apple ID. Then sign in with your Apple ID.
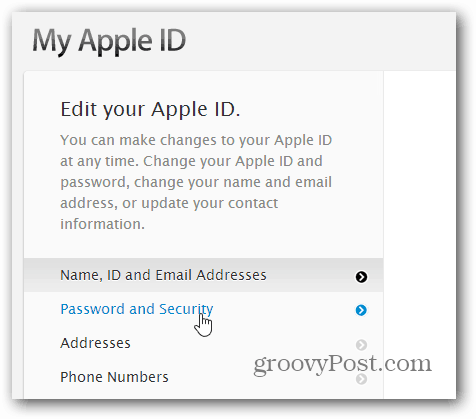
On the next page select Password and Security.
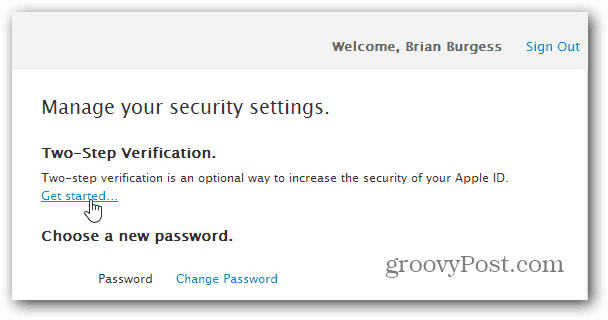
On the right side of the screen, click the Get Started link.
Now you’ll need to go through a few pages where Apple explains what Two-Step Verification means for your account. The last page will have some important things to note about how Apple does it. Click Get started.
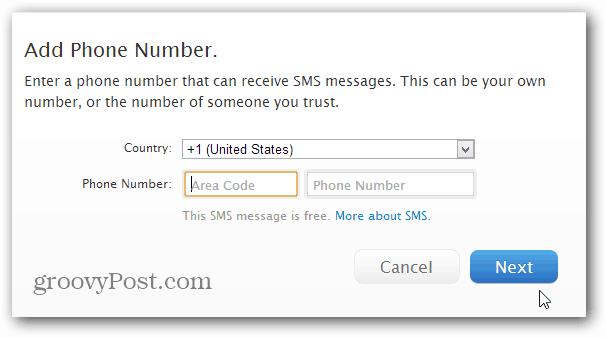
Type in the number of your smartphone.
Then you’ll get a notification on your phone with a four-digit code, type that in and click Continue.
Next, you’ll get a Recovery Key. Make sure to print it out and store it somewhere safe. Apple makes a point of reminding you about this and advises you to not even keep it on your computer for security reasons. If you ever forget your password or lose the smartphone you resisted, the only way to get in will be with the Recovery Key. To make sure you take this key seriously, Apple makes you retype it in. You can’t use a copy and paste option either.
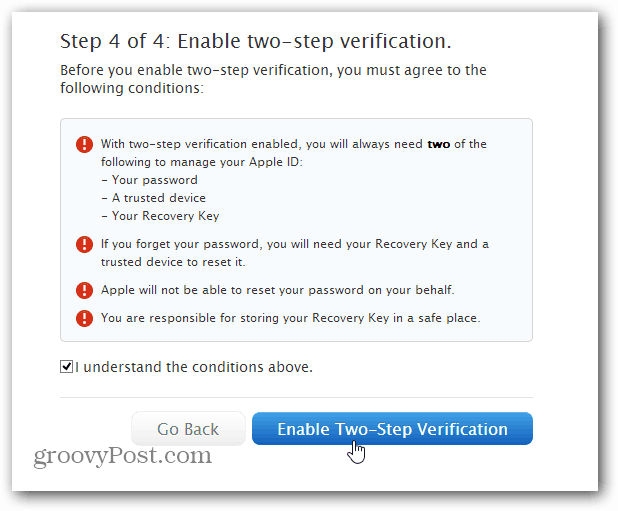
For the last step, you’ll need to agree to the conditions and click Enable Two-Step Verification.
Now when you want to make changes to your Apple ID, change your ID, or get ID support, you’ll need to use the Two-Step Verification process.
Two-Step Verification can be painful at times, but it definitely adds an important layer of extra security to your online accounts. We advise enabling it on every service online that supports it. Note: Two-Step Verification isn’t available in all countries. According to Apple: I didn’t know about this but will be setting it up on my account right away. Comment Name * Email *
Δ Save my name and email and send me emails as new comments are made to this post.
![]()
